
Popular Posts
Gateleen – A RESTful Middleware
Laurent Bovet We just open-sourced Gateleen ! This library is the base of our communications servers in projects where we need performance, sc
Reactive Plumber – A Groovy DSL for declarative Reactor streaming graphs
– Laurent Bovet You want to use Reactor (or RxJava) within a modular, readable and safe abstraction. Reactive Plumber let yo
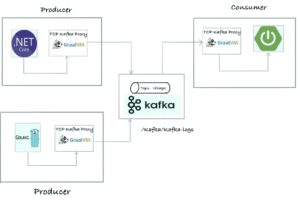
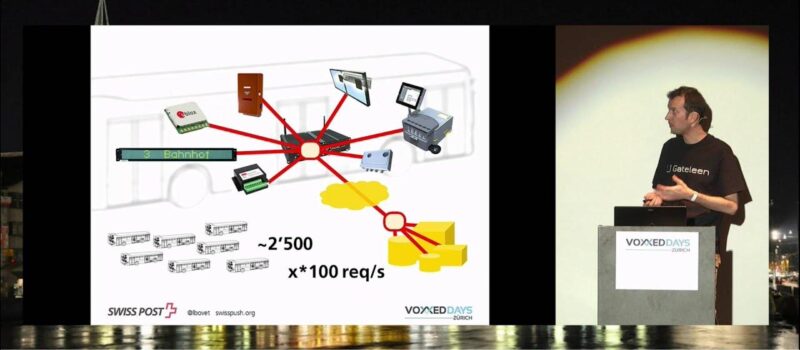
Kafka, Proxies and Service Mesh
Apikana – Integrated tooling for REST API Design
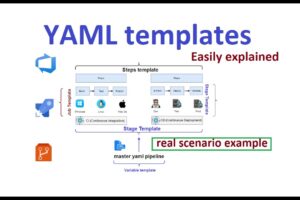
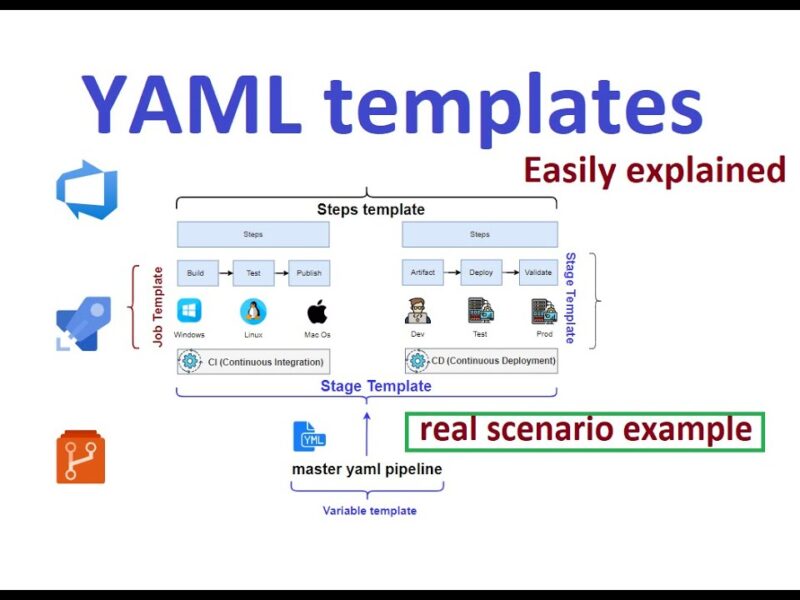
Painless YAML Templating
Pretty Compact JSON Display
Latest Article
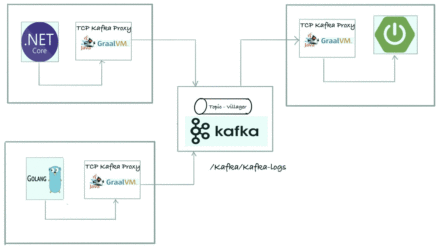
Kafka, Proxies and Service Mesh
– Laurent Bovet Service meshes are currently focusing on HTTP traffic. What about Kafka connectivity?
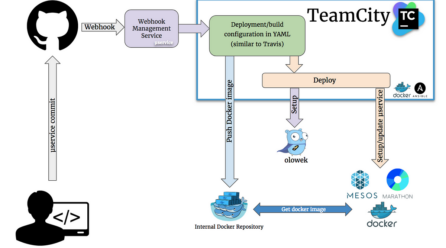
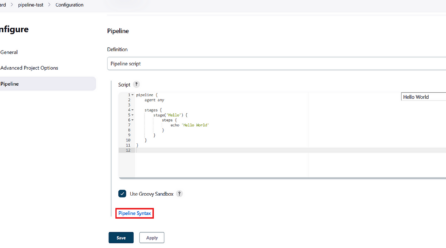
Build a CI environment with Mesos and Docker
– Gianluca Lupo Overview This article is a follow up of the “Setup Mesos on a single node” article. By default I have chosen to use Docker t
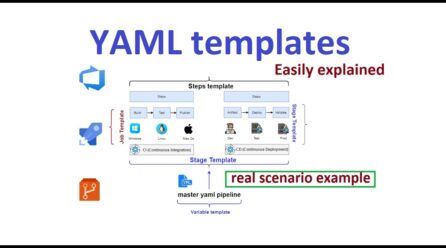
Painless YAML Templating
❤️YAML ? YAML is ubiquitous. Wether you love it or hate it, you have no choice but using it. It established itself as the configuration
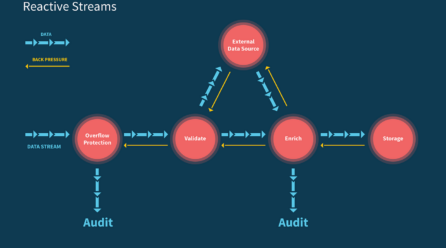
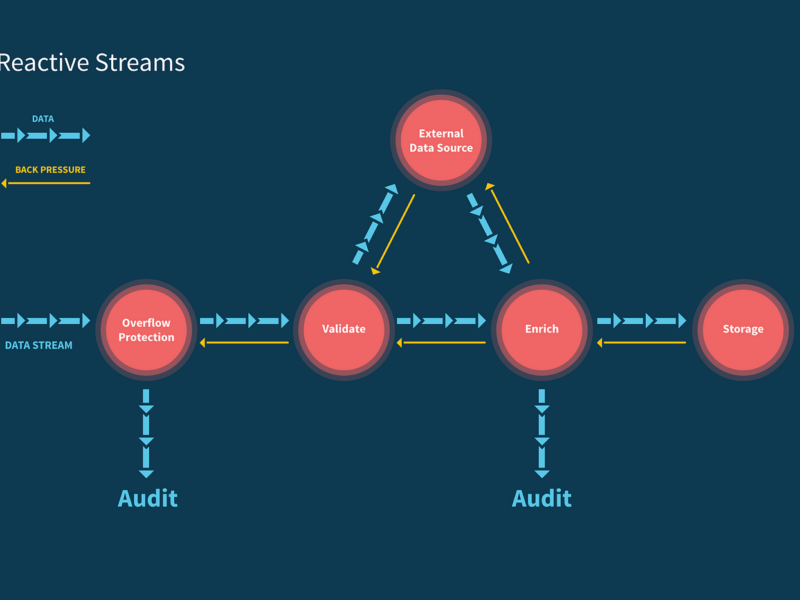
Learn Reactive Streams
– Laurent Bovet An Online Notebook as Teaching Tool You maybe know Jupyter notebooks and like this kind of format. So do I, especially for teach

Apikana – Integrated tooling for REST API Design
– Laurent Bovet We just open-sourced Apikana! Apikana combines the following tools to facilitate the authoring of contract-first REST APIs: It
Reactive Plumber – A Groovy DSL for declarative Reactor streaming graphs
– Laurent Bovet You want to use Reactor (or RxJava) within a modular, readable and safe abstraction. Reactive Plumber let yo